 Order & Get Your Valentine’s Gift!

 Order & Get Your Valentine’s Gift!
 Order & Get Your Valentine’s Gift!

If you are a beginner who just got in touch with DIY crafts and the Cricut machine, then you must go through this article to learn about the easiest and cutest crafting project: personalized stickers.
Lovely stickers are pretty and perfect for decorating both notebooks and cups. Sometimes you may realize that your daily belongings need little additions to show your personality, or the babies’ bedrooms should be retouched with some warm decorations. Even more, if you’re a business owner, label stickers are essential for broadening your brand recognition. No matter which situation, you can just do it with printable stickers!
Now, how to make stickers with Cricut? take some sticker paper for the printer and your Cricut Machine! Let’s go for it!

At first, we will talk about what Cricut is. Cricut is a brand specializing in cutting machines and heat press production, and it also sells an abundance of vinyl materials for crafting projects. But we use Cricut to make stickers here because of the print-then-cut feature of its cutting machines. Of course, other excellent cutting machines also feature this function, such as LOKLIK Crafter. If you prefer an economical replacement, that would be a good choice assisting in sticker works.
To realize this print-then-cut feature, you must first print your images through a printer. This image will be printed with a sensor mark alongside the outlines. After your images are printed by a printer, you can send the piece of printed sticker paper into the cutting machine. The cut sensor mark will be detected, and the machine will scan the images automatically to know where to start cutting.
Here, we need these items as provisions for sticker projects: sticker papers for a printer, a computer, an inkjet printer, and a Cricut cutting machine (not Cricut Joy, which is the only one that doesn’t combine the print-then-cut function).
For choosing sticker paper, there are Cricut Printable Sticker Paper, Cricut Printable Vinyl, HTVRONT Printable Sticker Paper, HTVRONT sticker printer paper, Silhouette Printable Sticker Paper, and so on. The difference among them is whether or not they’re resistant to water. The two types of Cricut materials and the Silhouette one are not very waterproof, which may perform a blended ink effect. Then you may add a layer of aerosol sealant on top of them to enhance their service lives.
As for HTVRONT Printable Sticker Paper, since this material comes with a sheet of glossy or matte adhesive film, it works well inside and outside.
OK now! It’s time for us to get into the making process and easily master the skill.
Step1: Choose and print your images.
If you want to make colorful stickers, find images you like on the computer by searching for them on Google. But when picking an image for further cut process, you need to note that some forms of images may not be compatible with the cutting app you will use. So please make sure the proper form first and then begin printing.
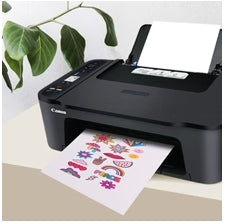
When you’ve selected the images you want, connect the printer to your computer. Remember to use an inkjet printer when working with printable sticker paper or printable vinyl. This printer will definitely help you perform a more vibrant and bright color compared to regular ones. Then, print your images out.

Step2: Open your Design Space.
Design space is an app related to Cricut machines, working as a picture editing tool, and can send the correct cutting code to your machine to realize the cut. First, open your Design Space and log in with your account. Then choose the images you print and upload them to the app. Once these images are uploaded to the app, the images will show up in the editing area.

Step3: Edit your image.
Now, you can edit the images. According to your applying item, you may change the shape and size. To make your results turn out to be much more lustrous, apply the “Offset” feature of the Design Space and highlight it.
But pay attention here if you are making images of simple lines, you may need to pick a shape from the shape option to cover the blank parts. After that, click “Weld” to combine all the parts and the offset.
Of course, if you just want to cut out simple letters or numbers without rich colors, you can also just design some patterns in the app by using regular shapes, fonts, and lines.
Before sending the code to the cutting machine, don’t forget that the stickers are normally small and printed together on just a sheet of sticker paper. Therefore, you may have to consider arranging their position to avoid waste.

Step4: Cut the image out.
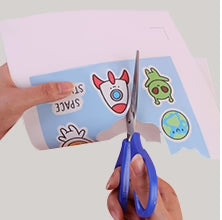
Then, fix your sticker paper on the cutting mat and load them into the cutting machine to begin cutting. After cutting, you can easily peel off the stickers and just decorate them on flat surfaces.

That’s all! How to make stickers with Cricut? Easy peasy for even beginners, right?! So now, you can pack up your Cricut machine and sticker paper and start your crafting journey!


To improve our service quality, we value your shopping experience at HTVRONT official website and your willingness to recommend us to others. Please take a few moments to complete this survey.Your opinions are important to us. Thank you for your participation and support!
Website interaction (e.g., shopping page, promotion, order, payment process)
Product (e.g., product quality, style)
Logistics (e.g., shipping, delivery)
Customer Service (e.g., response speed, professionalism)
[Website - Shopping Page]
[Website - Promotion]
[Website - Order and Payment Process]
[Product]
[Logistics]
[Customer Service]